Last week I took a class at
Ten Seconds Studio (shout out), on the basics of working with metal sheets in craft projects. The project was a wooden frame covered with metal that each person stylized, and it was just a lot of fun. Of course, I was the one person in class who knew early on that I wouldn't finish my project in class because I had to do things in my own persnickety way. This meant I used materials that needed overnight drying time and had to finish it at home the next day. It would be nice to take a class where I'm not the absolute last person finishing.
Inspired by my class and bolstered with all sorts of purchases, I came home to tackle a decor problem. We recently refurnished our living room and added some heavy duty drapes. Our entire west wall of the living room is windows (note to those buying a home in Texas: this is not a good idea, the afternoon summer sun is awful), and after adding these drapes, it looked like we had a wall of sheets hanging there. I wanted to add something shiny to the strips of wall between the windows to add a little depth and break up the look of all that fabric. I also didn't want to spend a fortune or multiple weekends on a hunt for the perfect little things.
Using metal sheets and tools from Ten Seconds Studio, some scrapbook paper, my Cricut, a case of Coors Light, and the free labor of a teenage boy, I was able to pull together these wall dangly things.
Metal Dangly Things
Before you go calling Child Protective Services, let me explain about the case of Coors Light and the teenage boy. The case was just that: the actual box that 24 Coors Light cans came in. (The hubby is always ready to do his part on my craft projects by supplying me with lots of chipboard from boxes of Coors Light, Diet Coke, and cereal.) The teenage boy is my son, who was faced with an afternoon of watching TV or of spending quality time with me. See, it was a bonding experience, not a corrupting a minor experience. And forcing him into a free labor situation builds character.
Teenager Deprived of TV and Forced to Build Character (and wall art)
We broke down the Coors Light box and a Diet Coke box to sheets of chipboard and used my Storybook Cricut cartridge to cut them out into interesting shapes. Those shapes would be the bases that we would cover with either metal or paper. We painted the backs a pretty cranberry color. We then embossed 4 pieces of metal per dangly thing, so 8 pieces total, using the Kabuka 15 and Big Momma 9 molds. After embossing and sanding, we slapped some adhesive on the backs and affixed them to the cut outs, trimming off the edges with some regular scissors.
More Free Labor!
With the extra cut outs of Coors Light box, we covered these with some complimentary scrapbook paper. After all the cut outs were covered, I used ribbon and glue to make two chains of the cut outs, with a loop on the top of each so I could dangle them properly on the wall. The whole project probably took less than $10 to make. Free labor will really reduce your costs.
Before: A Wall of Drapes
After: Ooo, Shiny!
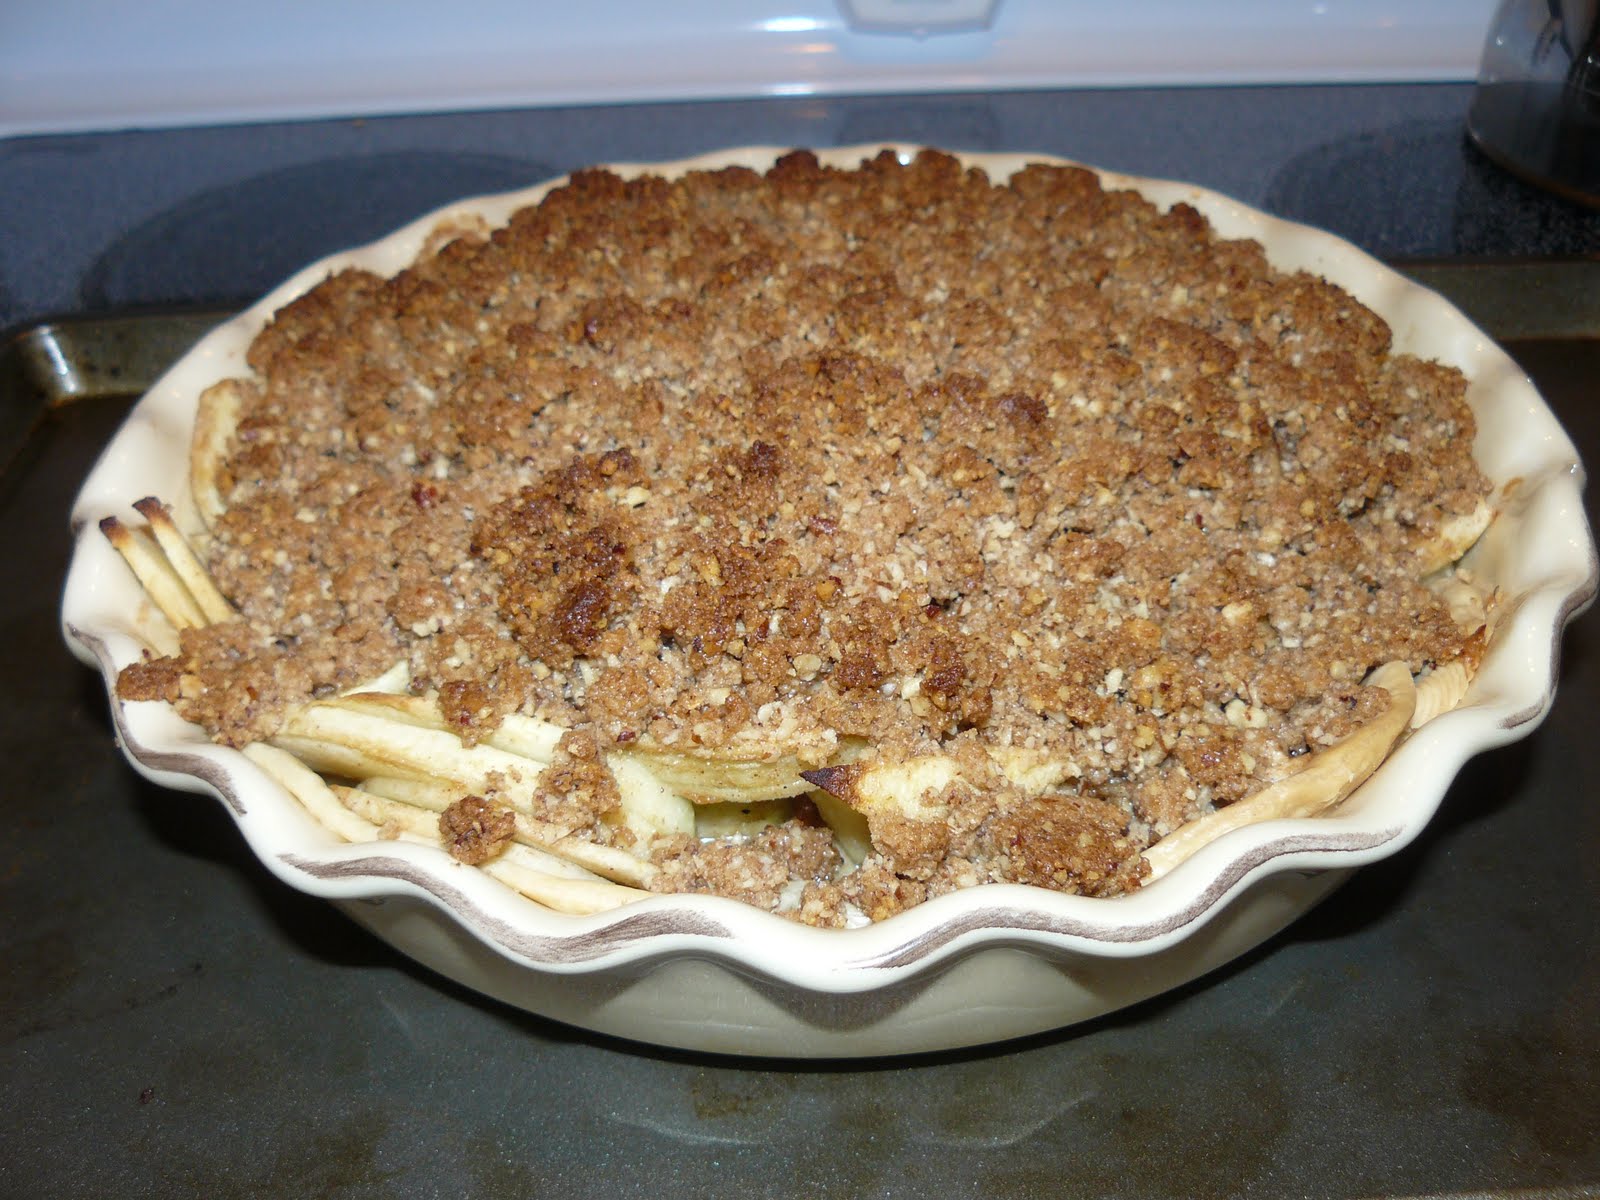
So what does this have to do with apple pie? Nothing, really, except that I made an apple pie before I started writing this blog. It's the best apple pie in the whole world, and my making it signals the official start of fall in my house. The pie has been cooking while I've been writing this, and I have to say that smelling cinnamon, apples, and butter is a good way to write.
Here's the pie and the recipe.
Apple Pecan Pie Ingredients:
9" deep dish pie shell, unbaked (you can make your own pie crust if you are a show off)
3/4 cup coarsely chopped pecans
8 c. peeled and thinly sliced apples (Rome or Granny Smith are the best)
1 c. sugar
2 T. flour
3/4 t. cinnamon
1/4 t. nutmeg
For the topping:
5 1/2 T. butter, softened
3/4 c. brown sugar
1/2 c. flour
3/4 t. cinnamon
3/4 c. finely chopped pecans
- Preheat the oven to 400 degrees.
- Let the pie shell come to room temperature and roll out into a deep dish pie pan.
- Combine apples, sugar, pecans, flour, cinnamon, and nutmeg.
- Mix well and dump into pie shell.
- Throw all the ingredients for the topping into a food processor and pulse about 10 ten times. Or just throw it all in a bowl and mix it all together till well blended and crumbly.
- Spread the topping over the apples.
- Cover the pie loosely with foil and bake for 20 minutes.
- Remove the foil and back for another 20 minutes.
- Remove, let it cool just a little.
- While it's cooling, put on a pot of coffee, 'cause you're going to want some. And ice cream (butter pecan or something with caramel works really well).
Now you're ready to eat! And so am I...
Piece (of pie) out!
Jenny


No comments:
Post a Comment