Congratulations to KathyG, winner of the standalone "Spooky" tags! Kathy, I'll bring the tags to you.
Amy, your name was drawn second. If you'd like the make-it kit to put together your own tags, email me at jennyboothe@gmail.com and let me know where to send it.
Thanks for everyone's interest! There'll be another giveaway soon, so keep tuned in. I really appreciate your encouragement. If you're enjoying the blog, let your friends know, then guilt-trip them into following. It's good practice if you're a mom.
Happy weekend!
Jenny
Friday, September 30, 2011
Monday, September 26, 2011
Crafts are Kind of Crazy (with a Spooky Little Girl Like Me)
What do I spy with my little eyes? Two giveaway winners!

October approaches, so it's time for watching Nightmare Before Christmas, listening to 'Thriller' on the oldies station (can you believe that? oldie??), and planning awesome costumes. YAY! I luurrrvvvve Halloween in a way that makes me spell "love" like a 14-year old British girl. That's a powerful love.
To help everyone get into the proper Halloween spirit, I'm offering up a Halloween craft that is only treat, no trick. First treat: instructions on how to make this little project. Second treat: you might win the finished project. Details on how to win follow the project instructions.
But, on to the project...
I used some cute Halloween paper I got at the Little Blue House (http://thelittlebluehouseblog.blogspot.com/) to create some new word tags. The paper is from The Apothecary Emporium by Echo Park Paper Company and Bella Boulevard's Halloween collection, as well as some various glitter paper. I have 6 blocks to hang tags from, so the word "Spooky" worked nicely as a 6-letter word to use (note: I did not rip this off from LBH; the fact that they also did Spooky tags this year is coincidental. I will always let you know if I've jacked a project, unless I have accidentally jacked it).

For a step-by-step tutorial, click the link below:
https://picasaweb.google.com/107274384649999210248/Movies?authkey=Gv1sRgCMif3oe544X4lQE#5656404991946415938
But, now for the REALLY important stuff: How to win your own spooky decor.
I have 2 giveaways this week. The first giveaway is for a completed set of standalone tags. Because they are standalone, they do NOT need blocks to hang from and look great sitting on a desk, a mantle, a counter, or any flat surface. This will given to a random selected follower of this blog. The rules are:
1. You can't be my husband.
2. You can't be my child.
3. You must be a follower of this blog.
That's it-- no test, no gimmicks, no entry fee (if you want to send me money, it won't hurt your chances, but it also won't help them). Relatives who don't live in my house are eligible, as are non-relatives. You must be a follower of this blog by 8 p.m. CT on Friday, Sept. 30.
The second giveaway is a kit to make your own tags. Everything is cut out and ready to be assembled. This is a great little project for time-crunched crafters, someone looking for an easy Halloween project to work on with a kid, or those of you who really like "working with" glue. These tags are NOT standalone--they are made to hang from something, but it doesn't need to be blocks. I think they'd look nice hanging on a cork board, for example. To win this set, you need to leave a comment.
Giveaway 1: Standalone Spooky tags - You must be a follower to be eligible to win


Winners will be selected Friday, Sept 30, and announced either late Friday night or Saturday morning (depending on if the Rangers play their first playoff game on Friday--Go Rangers!). Check back on Saturday to see if you've won. If you win, I will need your address to send you the prize.
Good luck!
Jenny

October approaches, so it's time for watching Nightmare Before Christmas, listening to 'Thriller' on the oldies station (can you believe that? oldie??), and planning awesome costumes. YAY! I luurrrvvvve Halloween in a way that makes me spell "love" like a 14-year old British girl. That's a powerful love.
To help everyone get into the proper Halloween spirit, I'm offering up a Halloween craft that is only treat, no trick. First treat: instructions on how to make this little project. Second treat: you might win the finished project. Details on how to win follow the project instructions.
But, on to the project...
I used some cute Halloween paper I got at the Little Blue House (http://thelittlebluehouseblog.blogspot.com/) to create some new word tags. The paper is from The Apothecary Emporium by Echo Park Paper Company and Bella Boulevard's Halloween collection, as well as some various glitter paper. I have 6 blocks to hang tags from, so the word "Spooky" worked nicely as a 6-letter word to use (note: I did not rip this off from LBH; the fact that they also did Spooky tags this year is coincidental. I will always let you know if I've jacked a project, unless I have accidentally jacked it).

For a step-by-step tutorial, click the link below:
https://picasaweb.google.com/107274384649999210248/Movies?authkey=Gv1sRgCMif3oe544X4lQE#5656404991946415938
But, now for the REALLY important stuff: How to win your own spooky decor.
I have 2 giveaways this week. The first giveaway is for a completed set of standalone tags. Because they are standalone, they do NOT need blocks to hang from and look great sitting on a desk, a mantle, a counter, or any flat surface. This will given to a random selected follower of this blog. The rules are:
1. You can't be my husband.
2. You can't be my child.
3. You must be a follower of this blog.
That's it-- no test, no gimmicks, no entry fee (if you want to send me money, it won't hurt your chances, but it also won't help them). Relatives who don't live in my house are eligible, as are non-relatives. You must be a follower of this blog by 8 p.m. CT on Friday, Sept. 30.
The second giveaway is a kit to make your own tags. Everything is cut out and ready to be assembled. This is a great little project for time-crunched crafters, someone looking for an easy Halloween project to work on with a kid, or those of you who really like "working with" glue. These tags are NOT standalone--they are made to hang from something, but it doesn't need to be blocks. I think they'd look nice hanging on a cork board, for example. To win this set, you need to leave a comment.
Giveaway 1: Standalone Spooky tags - You must be a follower to be eligible to win

Giveaway 2: Make your own tags kit - You must leave a comment to be eligible to win

Winners will be selected Friday, Sept 30, and announced either late Friday night or Saturday morning (depending on if the Rangers play their first playoff game on Friday--Go Rangers!). Check back on Saturday to see if you've won. If you win, I will need your address to send you the prize.
Good luck!
Jenny
Monday, September 19, 2011
Dashing Pumpkins
Pumpkins, pumpkins everywhere, but not the kind you eat.
With the temps finally below 100 degrees and the baseball post-season in sight, things around my house needed to be a bit more autumnal. I've been crafting up some Halloween goodies lately, so the office has been an explosion of fall colors for a couple of weeks, but the rest of the house--not so much. I love the color orange and decided to focus my attention on pumpkins. I don't like farming (please see post script: Reasons I Am Not Amish), and did not grow pumpkins, but still managed to make them.
Here are the 2 pumpkin projects I did this weekend along with a link to a video showing how to do it.


Now, about those Halloween goodies I was mentioning. Next week, I'll give you a chance to win your very own made-with-love-and-adhesive Halloween craft. In order to win, you need to:
- Follow this blog. Don't just look at it. Be a follower!
- Not be married to me.
- Not be someone I gave birth to.
All other relatives are eligible, mainly because it would alienate a good number of my followers if I eliminated all relatives. A random name will be drawn on 9/30 from all followers (except the hubby and son), but don't wait till then--follow now!
See you next week!
Jenny
P.S. Reasons I Am Not Amish
1. I like electricity.
2. I do not like farming or quilting.
3. The Amish tend to live in areas that get a lot of snow in the winter.
4. I like to curse.
5. I don't like facial hair on men (or women, for that matter).
The only reason I have to consider the Amish lifestyle is the amazing pies, but I make pretty good pies already, so being Amish is out for me.
Wednesday, September 14, 2011
As American as Metal Crafting and Apple Pie
Last week I took a class at Ten Seconds Studio (shout out), on the basics of working with metal sheets in craft projects. The project was a wooden frame covered with metal that each person stylized, and it was just a lot of fun. Of course, I was the one person in class who knew early on that I wouldn't finish my project in class because I had to do things in my own persnickety way. This meant I used materials that needed overnight drying time and had to finish it at home the next day. It would be nice to take a class where I'm not the absolute last person finishing.
Inspired by my class and bolstered with all sorts of purchases, I came home to tackle a decor problem. We recently refurnished our living room and added some heavy duty drapes. Our entire west wall of the living room is windows (note to those buying a home in Texas: this is not a good idea, the afternoon summer sun is awful), and after adding these drapes, it looked like we had a wall of sheets hanging there. I wanted to add something shiny to the strips of wall between the windows to add a little depth and break up the look of all that fabric. I also didn't want to spend a fortune or multiple weekends on a hunt for the perfect little things.
Using metal sheets and tools from Ten Seconds Studio, some scrapbook paper, my Cricut, a case of Coors Light, and the free labor of a teenage boy, I was able to pull together these wall dangly things.

Before you go calling Child Protective Services, let me explain about the case of Coors Light and the teenage boy. The case was just that: the actual box that 24 Coors Light cans came in. (The hubby is always ready to do his part on my craft projects by supplying me with lots of chipboard from boxes of Coors Light, Diet Coke, and cereal.) The teenage boy is my son, who was faced with an afternoon of watching TV or of spending quality time with me. See, it was a bonding experience, not a corrupting a minor experience. And forcing him into a free labor situation builds character.

We broke down the Coors Light box and a Diet Coke box to sheets of chipboard and used my Storybook Cricut cartridge to cut them out into interesting shapes. Those shapes would be the bases that we would cover with either metal or paper. We painted the backs a pretty cranberry color. We then embossed 4 pieces of metal per dangly thing, so 8 pieces total, using the Kabuka 15 and Big Momma 9 molds. After embossing and sanding, we slapped some adhesive on the backs and affixed them to the cut outs, trimming off the edges with some regular scissors.

With the extra cut outs of Coors Light box, we covered these with some complimentary scrapbook paper. After all the cut outs were covered, I used ribbon and glue to make two chains of the cut outs, with a loop on the top of each so I could dangle them properly on the wall. The whole project probably took less than $10 to make. Free labor will really reduce your costs.


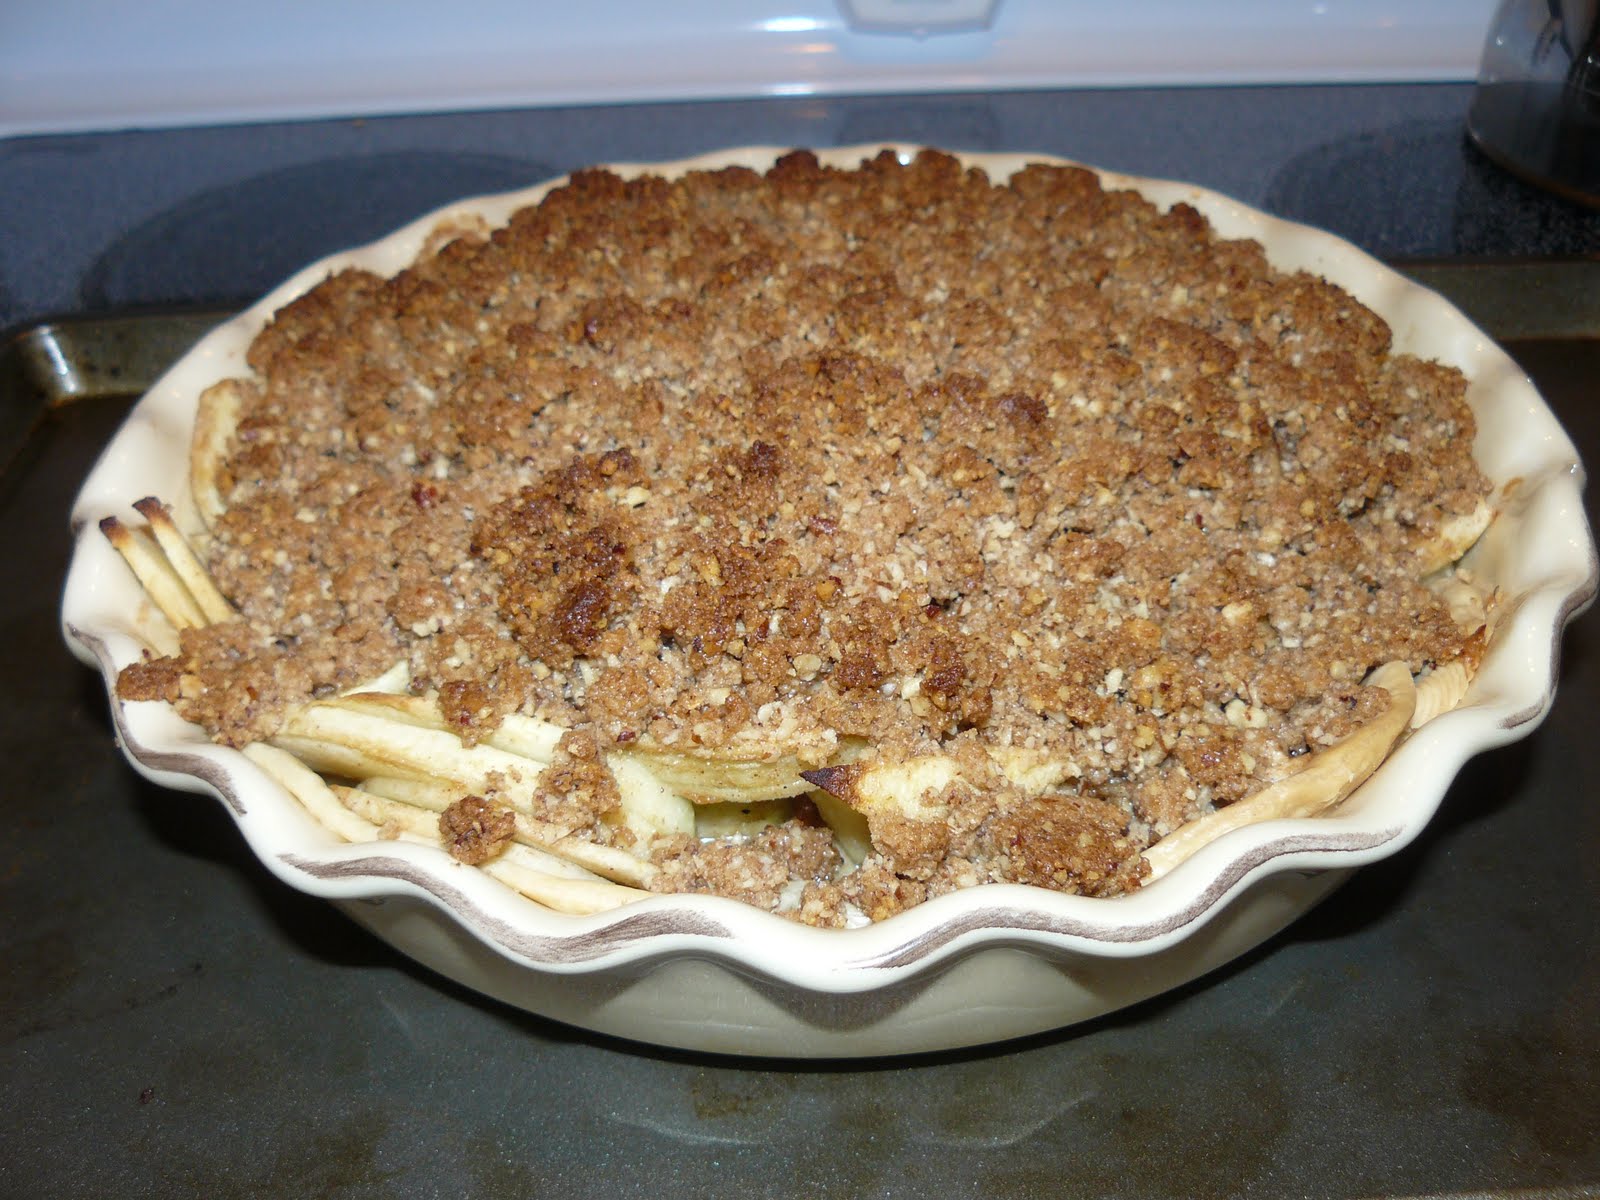
So what does this have to do with apple pie? Nothing, really, except that I made an apple pie before I started writing this blog. It's the best apple pie in the whole world, and my making it signals the official start of fall in my house. The pie has been cooking while I've been writing this, and I have to say that smelling cinnamon, apples, and butter is a good way to write.
Here's the pie and the recipe.

Apple Pecan Pie Ingredients:
9" deep dish pie shell, unbaked (you can make your own pie crust if you are a show off)
3/4 cup coarsely chopped pecans
8 c. peeled and thinly sliced apples (Rome or Granny Smith are the best)
1 c. sugar
2 T. flour
3/4 t. cinnamon
1/4 t. nutmeg
For the topping:
5 1/2 T. butter, softened
3/4 c. brown sugar
1/2 c. flour
3/4 t. cinnamon
3/4 c. finely chopped pecans
Piece (of pie) out!
Jenny

Metal Dangly Things

Teenager Deprived of TV and Forced to Build Character (and wall art)

More Free Labor!

Before: A Wall of Drapes

After: Ooo, Shiny!
9" deep dish pie shell, unbaked (you can make your own pie crust if you are a show off)
3/4 cup coarsely chopped pecans
8 c. peeled and thinly sliced apples (Rome or Granny Smith are the best)
1 c. sugar
2 T. flour
3/4 t. cinnamon
1/4 t. nutmeg
5 1/2 T. butter, softened
3/4 c. brown sugar
1/2 c. flour
3/4 t. cinnamon
3/4 c. finely chopped pecans
- Preheat the oven to 400 degrees.
- Let the pie shell come to room temperature and roll out into a deep dish pie pan.
- Combine apples, sugar, pecans, flour, cinnamon, and nutmeg.
- Mix well and dump into pie shell.
- Throw all the ingredients for the topping into a food processor and pulse about 10 ten times. Or just throw it all in a bowl and mix it all together till well blended and crumbly.
- Spread the topping over the apples.
- Cover the pie loosely with foil and bake for 20 minutes.
- Remove the foil and back for another 20 minutes.
- Remove, let it cool just a little.
- While it's cooling, put on a pot of coffee, 'cause you're going to want some. And ice cream (butter pecan or something with caramel works really well).
Jenny
Tuesday, September 6, 2011
Better Living through Crafts
Do you have some little thing in your house that just drives you nuts? Not a kid or a pet--it's a given that they will drive you nuts--but some component of your home that every time you see it you want to bash it with a sledgehammer?
When we built our house 11 years ago, we had the typical experience. Despite our diligence in regularly inspecting the work being performed, mistakes were made. There were big mistakes, little mistakes, medium mistakes: mistakes of every flavor, things you wouldn't even imagine.One of the mistakes was the placement of the kitchen phone jack. Remember waaaayyyy back 11 years ago when everyone had a home phone? Seems kind of quaint. But I digress...
I wanted a wall phone jack in the kitchen, to hang my phone on the wall, as it was in my mother's house and in her mother's house before her. Generations of the women of my family talked on the phone while lovingly fixing meals to nourish those they cared most about. This is as close to tradition as we get. I wanted to live in the ways of these women, having a phone near at hand while nuking leftovers.
The problem with the kitchen phone jack is that it was not placed in the kitchen. Ends up that the builder forgot to put it in, and when I pointed this out, the back splash tile was already installed, the walls were up, the wires were in, blah blah blah. Basically, it was inconvenient for them to put it in where the plans stated it should be: in the kitchen. The alternative, they decided, was to round the corner of the wall and put it in the living room, where, if you have monkey arms or are the love child of Plastic Man, you could possibly reach the phone while working in the kitchen. This means they added the protruding, plastic-faced wall jack at eye level at the entry of the room. Lovely.
I thought I could live with it. After all, we had really big mistakes to worry about, and it was a bad move to take their focus off those big problems. An unsightly wall jack in an inconvenient location seemed like something I could let go of.
However, that is not my style. I don't let go of things. Everyone needs a fatal flaw, and this one is mine (and I have a memory like an elephant--what a bad combination). Sure, time would pass where I wouldn't think about it, but sooner or later, I'd catch site of that plastic and metal wall tumor. It would remind me of every mistake the builder made. I knew that one day I'd take a look at it, run through the mental catalog of errors and how upset I was, which would remind me of some incident in the 2nd grade that also upset me, and then I'd remember other upsetting things, until, finally, I'd have a stroke. This wall jack was trying to kill me.


In order to improve my longevity without stepping into a gym, I decided the wall jack was the bad hair day of my home, and it needed a hat.
Using a frame I made last year at The Little Blue House as my inspiration, I took 2 unfinished wood frames (the cheapo kinds you buy at Michael's for your kid to paint as a Father's Day gift) and covered them with paint, scrapbook paper, and embossed metal sheets.

I was happy with the frame, but still had a problem. With the flat back of the frame, I couldn't hang it over top of the wall jack because the jack sticks out from the wall nearly a half inch. I needed to build up the back of the frame to accommodate the jack. To that end, I took an old, cheap metal frame that was in a box of crud in the garage, removed the glass, cardboard, and backing from it, and then glued the metal frame carcass to the back of the wooden frame. This gives the frame a lift around the entire back, effectively raising the back of the frame away from the wall enough to cover the jack.

Crisis averted. If I can just learn to avoid Wal-Mart on Saturdays, I should have many more stroke-free years ahead of me.
Now go be nostalgic, you crazy kids, and get yourself a home phone line!
Jenny
Subscribe to:
Comments (Atom)